
Takt Planning
User Guide
1. Introduction
Takt Planning helps project teams organise construction work into a clear production rhythm. The planning board shows locations and weeks so that teams can coordinate trades, balance work flow and monitor progress.
Use Takt Planning to create locations, trades, contractors and tasks, then manage task status directly from the planning board.
2. Takt Planning Workspace
The workspace consists of a toolbar, a week selector, a planning board and task cards. Each row represents a location and each column represents a planning week.
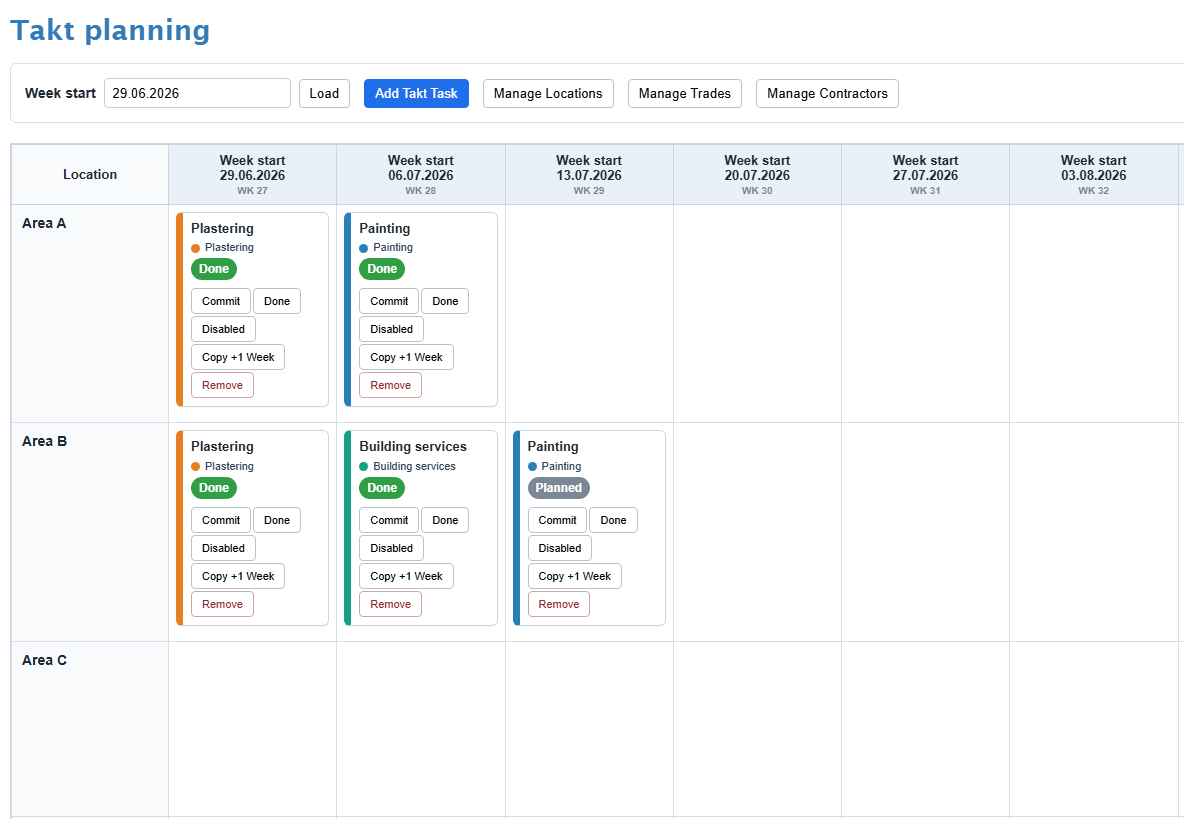
| Area | Description |
|---|---|
| Week start | Selects the first week displayed on the planning board. |
| Add Takt Task | Creates a new Takt task. |
| Manage Locations | Maintains the locations shown as rows on the board. |
| Manage Trades | Maintains trades, trade order and trade colours. |
| Manage Contractors | Maintains contractors and assigns them to trades. |
| Planning board | Displays work by location and week. |
| Task cards | Show task information, status and quick actions. |
3. Managing Locations
Locations define where work is performed. Typical locations are floors, apartments, zones or work areas. Organising tasks by location makes it easier to visualise production flow.
Add a Location
- Click Manage Locations.
- Click Add Location.
- Enter the location name.
- Click Save.
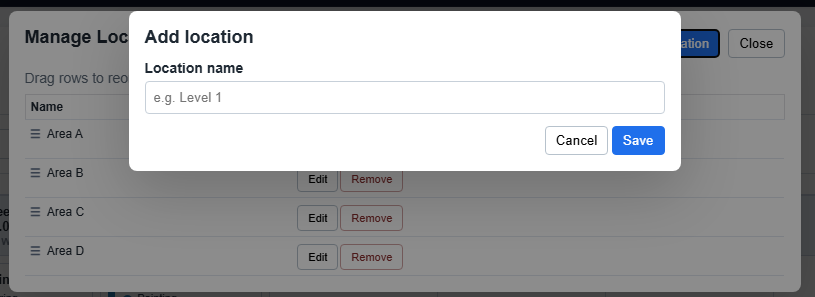
Edit, remove and reorder locations
Use the location list to edit or remove locations. You can also drag rows to reorder locations. The order controls how locations are shown on the Takt Planning board.
4. Managing Trades
Trades represent the different work disciplines involved in the project. Each trade has its own colour, which is used on task cards throughout the planning board.
Add a Trade
- Click Manage Trades.
- Click Add Trade.
- Enter the trade name.
- Select a colour for the trade.
- Click Save.
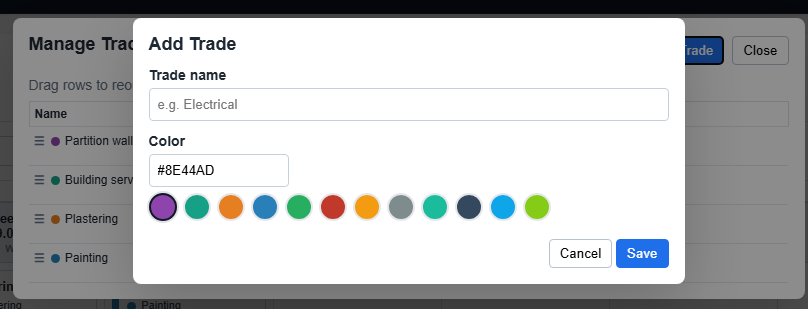
Edit, remove and reorder trades
Use the trade list to edit trade names and colours, remove unused trades, or drag rows to reorder trades. Trade order affects the production sequence shown on the board.
5. Managing Contractors
Contractors represent the companies or teams responsible for carrying out the work. Each contractor is assigned to a trade.
Add a Contractor
- Click Manage Contractors.
- Click Add Contractor.
- Enter the contractor name.
- Select the trade the contractor belongs to.
- Click Save.
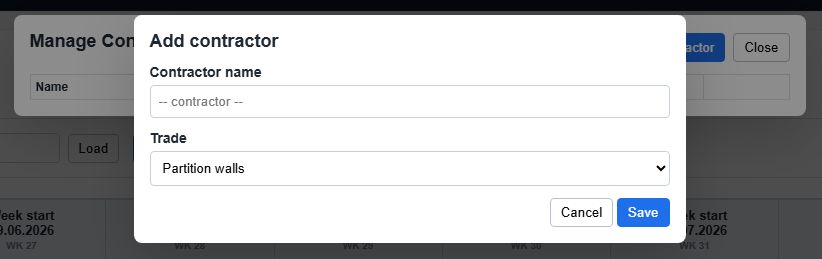
Edit or remove contractors
Use the contractor list to edit contractor names, change the assigned trade or remove contractors that are no longer needed.
6. Creating Takt Tasks
Takt tasks represent work that will be performed at a specific location during a planned week.
Add a Takt Task
- Click Add Takt Task.
- Enter the task name.
- Select the location.
- Select the week start.
- Select the trade.
- Select the contractor if required.
- Enter the duration in days.
- Optionally enter a Takt wagon name.
- Select Buffer task if the task is used as a production buffer.
- Click Save.
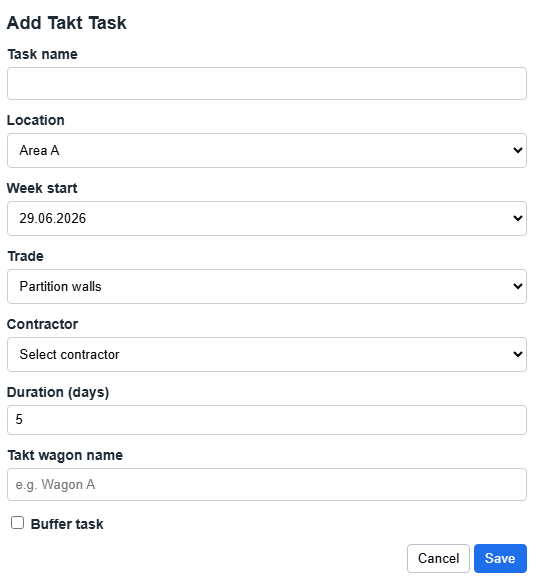
| Field | Description |
|---|---|
| Task name | Name of the planned work activity. |
| Location | Project area where the work will be performed. |
| Week start | The planning week in which the task begins. |
| Trade | Work discipline responsible for the task. |
| Contractor | Company or team performing the work. |
| Duration | Planned task duration in working days. |
| Takt wagon name | Optional identifier for the production sequence. |
| Buffer task | Marks the task as a production buffer. |
7. Working with Task Cards
Each Takt task is displayed as a task card on the planning board. The card provides quick access to task information and common actions.
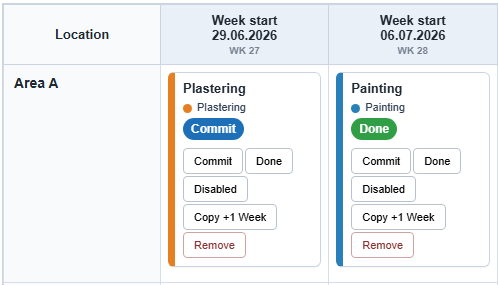
| Element | Description |
|---|---|
| Task name | Name of the work activity. |
| Trade | Trade responsible for the task. |
| Status | Displays the current task status. |
| Commit | Confirms that the team commits to completing the task during the planned week. |
| Done | Marks the task as completed. |
| Disabled | Marks the task as unable to proceed. A reason can be recorded. |
| Copy +1 Week | Creates a copy of the task in the following week. |
| Remove | Deletes the task from the planning board. |
Task Status
| Status | Meaning |
|---|---|
| Planned | The task has been created but work has not yet been committed. |
| Commit | The team has committed to completing the work during the planned week. |
| Done | The task has been completed successfully. |
| Disabled | The task cannot proceed. A reason may be entered. |
8. Buffer Tasks
A buffer task is used to absorb production variation or protect the flow of work. Buffer tasks are useful when the team wants to reserve time between work packages or create flexibility in the production sequence.
- Create or edit a Takt task.
- Select Buffer task.
- Save the task.
9. Moving and Copying Tasks
Move a Task
Move a task by dragging the task card to another location or week on the planning board. The task location and planned week are updated automatically.
Copy a Task to the Next Week
- Click Copy +1 Week on the task card.
- A copy of the task is created in the following week.
- Update the copied task if necessary.
Remove a Task
- Click Remove on the task card.
- Confirm the deletion if prompted.
10. Exporting and Reporting
Export the Takt Planning board for project meetings, reporting and offline review.
| Export option | Description |
|---|---|
| Current View PDF | Exports the currently visible board. |
| Full Board PDF | Exports the complete planning board. |
11. FAQ
Why can I not edit a task?
Your access may be read-only. Contact the project administrator.
Why can I not remove a trade?
The trade may still be used by tasks or contractors.
Why does a contractor not appear?
The contractor may be assigned to a different trade. Check the contractor trade assignment.
Why is the board empty?
There may be no tasks in the selected planning period. Select another week start date or add new tasks.
12. Troubleshooting
| Problem | Possible cause | Solution |
|---|---|---|
| Cannot save task. | Required fields are missing. | Check task name, location, week start and trade. |
| Cannot delete trade. | Trade is still in use. | Remove or update related tasks and contractors first. |
| Cannot delete location. | Location has existing tasks. | Move or delete tasks before removing the location. |
| Contractor is missing. | Contractor is assigned to another trade. | Check the contractor's assigned trade. |
| Task status is Disabled. | The task cannot proceed. | Review the recorded reason and update the task when ready. |