
Gantt Schedule
User Guide
1. Introduction
The Gantt Schedule helps project teams plan, manage and monitor construction project activities on a visual timeline.
Use it to create tasks, organise project phases, link dependent work, follow progress and export schedule reports.
2. Understanding the Gantt Workspace
The workspace contains a task list on the left and a timeline on the right. The toolbar provides the main schedule actions.
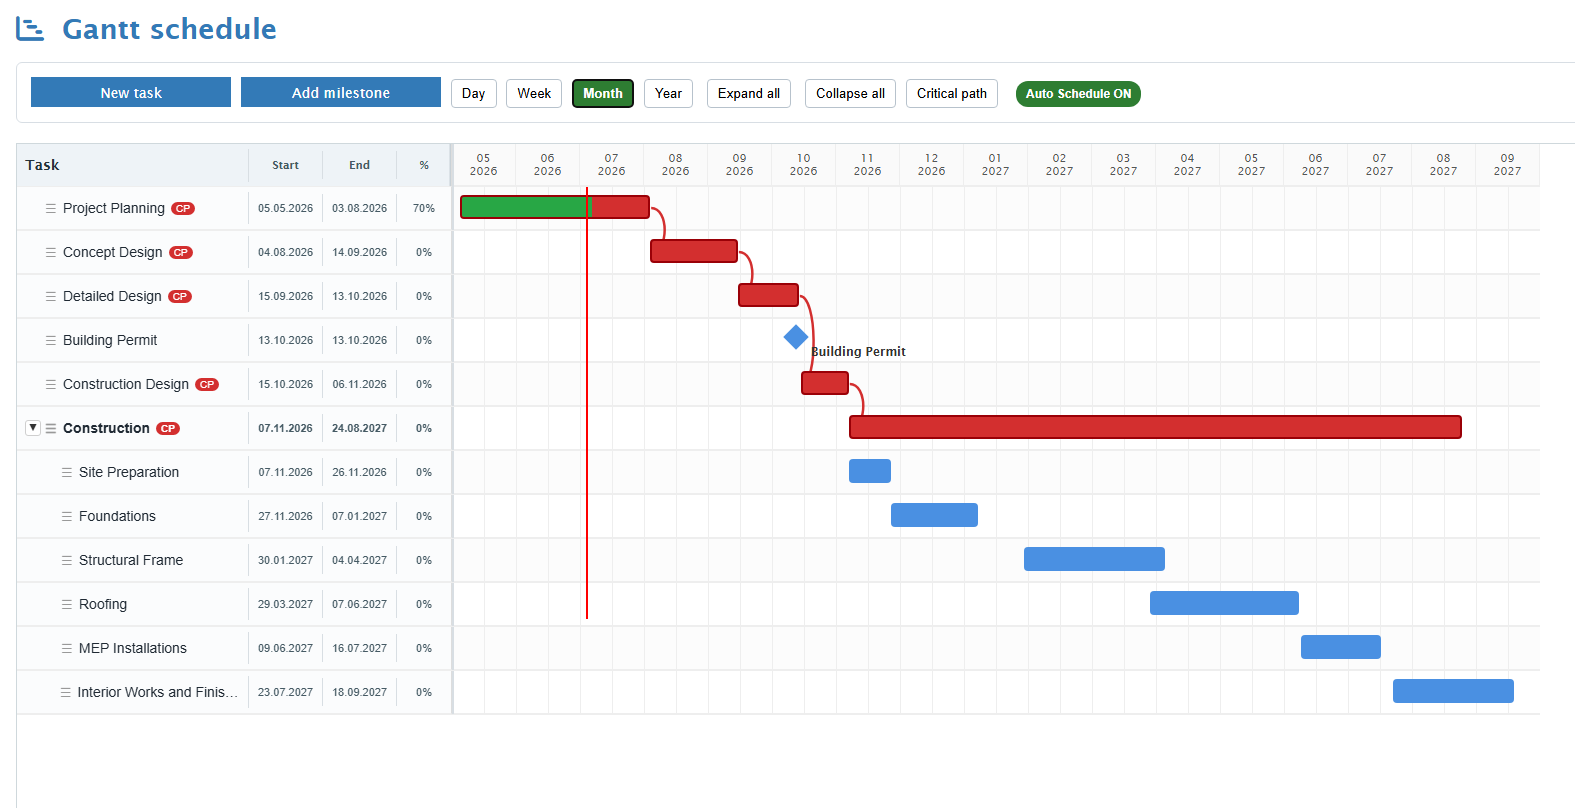
| Area | Description |
|---|---|
| Toolbar | Create tasks and milestones, change the timeline view, expand or collapse tasks, show the Critical Path and export reports. |
| Task list | Displays task names, start dates, finish dates and progress. |
| Timeline | Shows tasks as bars and milestones as diamond symbols. |
| Current date line | The red vertical line shows the current date. |
3. Building the Schedule
Build the schedule by creating tasks, editing task details and organising tasks into a clear hierarchy.
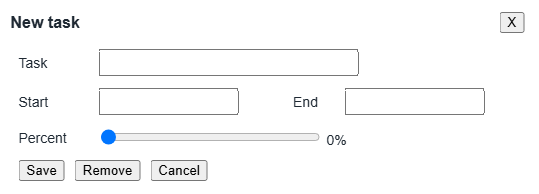
Create a task
- Click Add Task.
- Enter the task name.
- Select the start date and finish date.
- Set progress if the task has already started.
- Click Save.
Edit a task
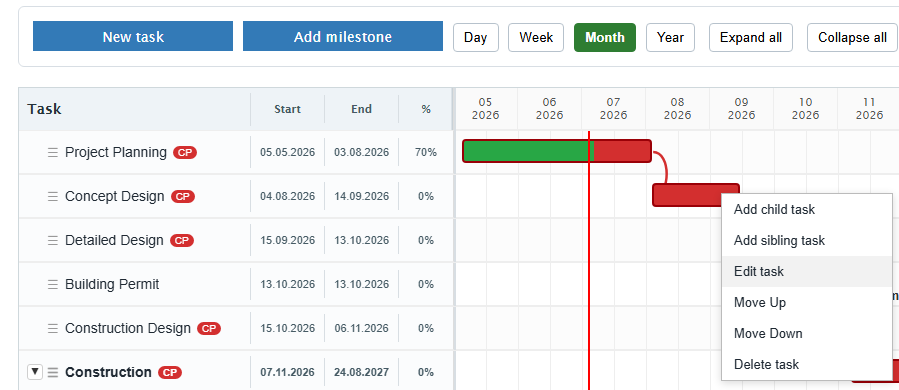
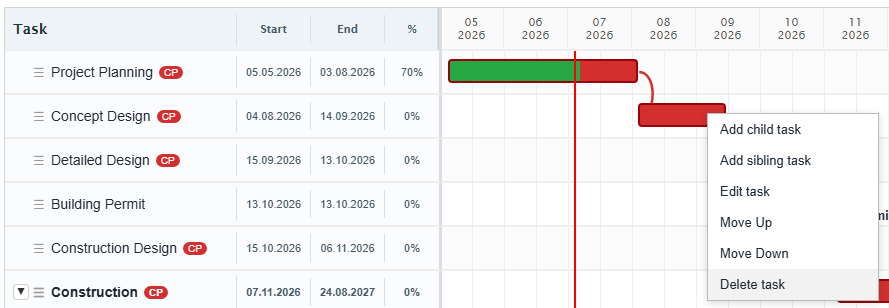
- Right-click the task.
- Select Edit Task.
- Update the required task information.
- Save the changes.
Create a child task
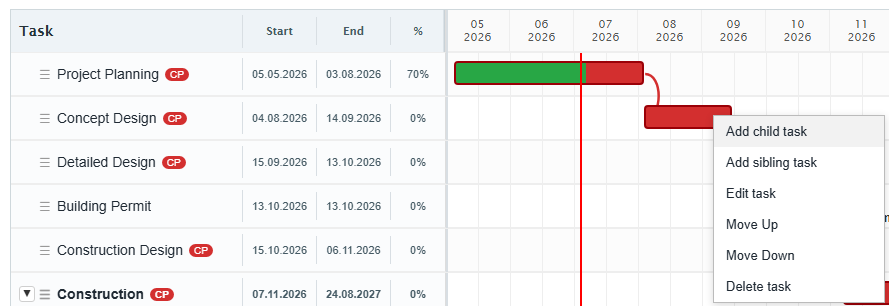
- Right-click the task that should become the parent.
- Select Add Child Task.
- Enter the child task details.
- Save the task.
Delete a task
- Right-click the task.
- Select Delete Task.
- Confirm the deletion if prompted.
4. Managing Dependencies
Dependencies define the order in which tasks should be completed. They help show which tasks must finish before another task can start.
- Move the mouse to the end of the predecessor task bar.
- Drag the dependency connector toward the successor task.
- Release the mouse button on the target task.

5. Monitoring the Schedule
Use progress, task colours, the current date line and Critical Path view to understand the project status.
| Feature | Purpose |
|---|---|
| Progress | Shows how much of a task is complete. |
| Critical Path | Highlights tasks that affect the project completion date. |
| Late tasks | Help identify work that is behind schedule. |
| Timeline views | Switch between day, week, month and year views. |
6. Exporting and Reporting
Export the schedule for project meetings, reporting and offline review.
| Export option | Description |
|---|---|
| Current View PDF | Exports the visible part of the schedule. |
| Full Gantt PDF | Exports the complete schedule. |
| Excel | Exports task data for further analysis. |
7. FAQ
Why did another task move when I changed a date?
Auto Schedule may be enabled. In that case, dependent tasks can be moved automatically.
Why can I not edit the schedule?
Your user rights may be read-only. Contact the project administrator.
8. Troubleshooting
| Problem | Possible cause | Solution |
|---|---|---|
| The task cannot be edited. | Read-only permission. | Ask the administrator to check your access rights. |
| The task cannot be deleted. | The task has child tasks. | Remove or move child tasks first. |
| Task dates change automatically. | Auto Schedule is enabled. | Review dependencies and the Auto Schedule status. |